STEP 1 #
From the top main navigation bar of your staff account, click on the “take order” link (See fig.1).

STEP 2: Order Log Capabilities & Appearance #
Here are important capabilities that the order log has:
- It can hold up to 1,000 orders per day (000 to 999)
- The order log will automatically clear itself of all orders at midnight local time.
- You can filter orders by status.
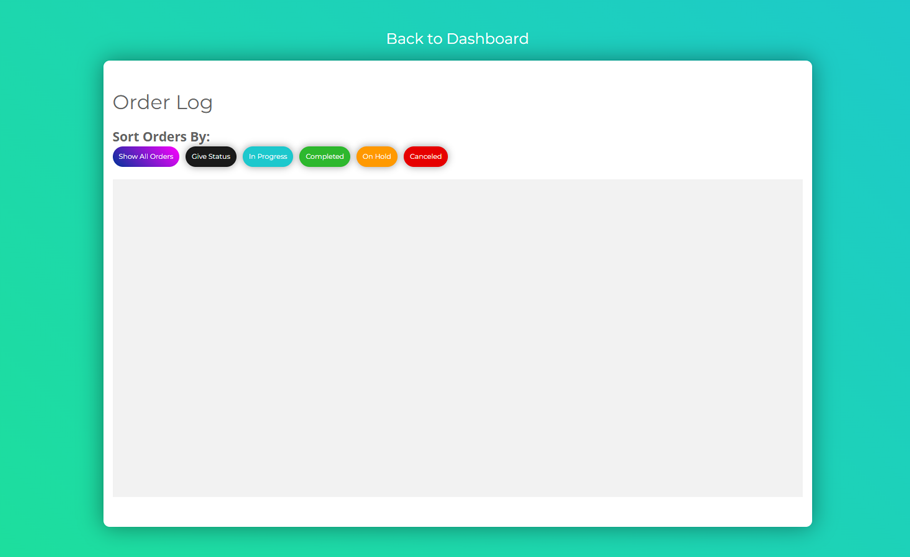
If there are no orders that have been taken, the Order Log will look something like fig 2.

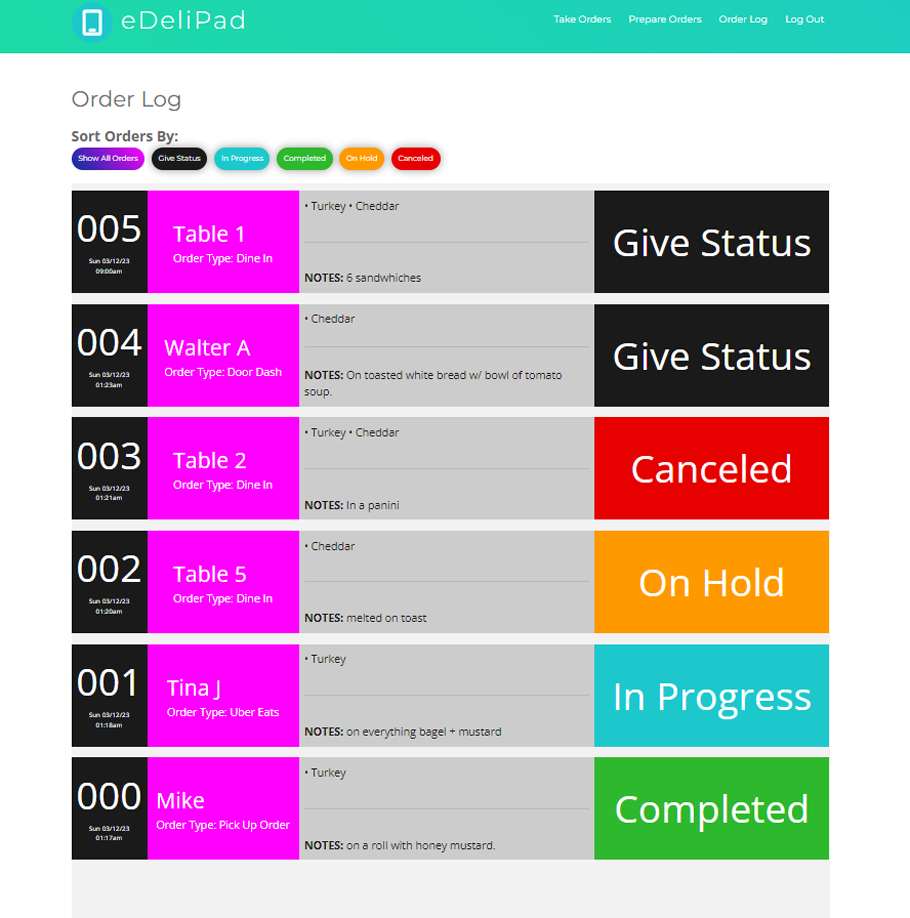
When the order log becomes populated, it will look something like fig 3.

STEP 3: How to Read an Order Log Entry #
Order log entries use a combination of color coding and text to inform the user about the important aspects of an order.
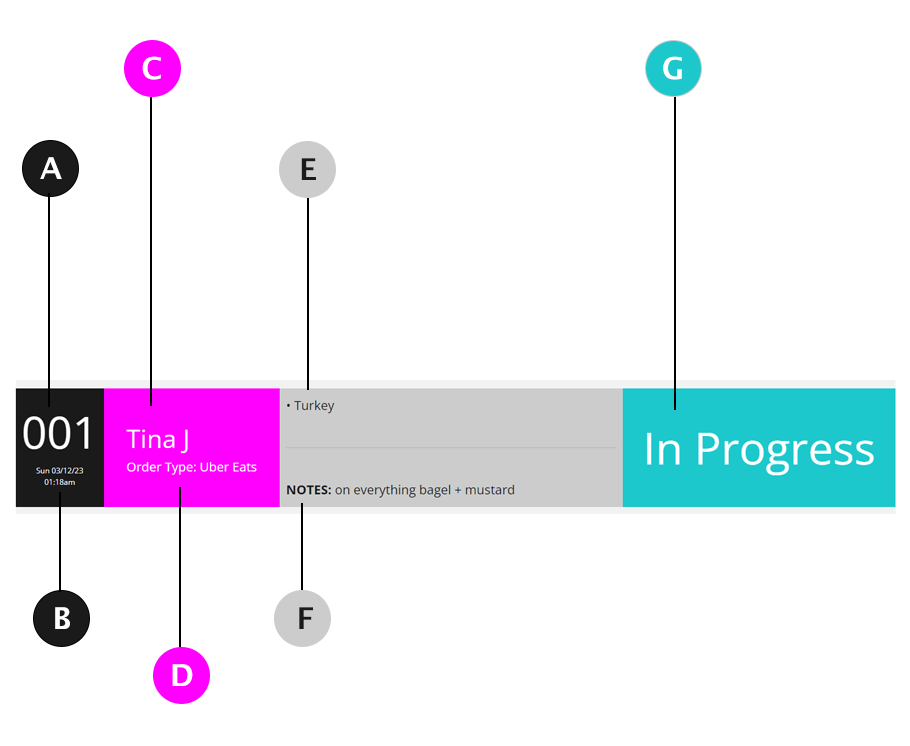
Use fig 4. as a guide for how to read all of the information that an order log entry has to offer.

A) Order Number #
The order number is displayed to help identify the order and to show how many orders have been taken in a day. Up to 1,000 orders can be taken by eDeliPad per day. The first order of the day always starts at “000” and the last possible order for that day is “999”.
B) Order Date #
Both the date and time of an order is displayed here. The time is provided in local time based on the time zone the shop is located.
C) Customer Name or Table Number #
The customer name or a table number can be taken and displayed in order to help further identify who the order belongs too.
D) Order Type #
Here, the user can see if the order will be dine-in, picked up in person, or picked up by one of the various delivery sources such as Uber Eats.
E) Order Items #
This is where the actual food items are listed for an order.
F) Order Notes #
Additional details of the order are placed here.
G) Order Status #
Once an order has been placed by a staff member, the status of the order can be adjusted. Available status settings are: In Progress, Completed, On Hold, and Canceled.
STEP 4: Filtering Orders by Status #
Options are given by eDeliPad to view orders via status filters, as seen in fig. 5.

The status filters are:
Show All Orders #
This is the default setting that orders are shown. All orders are displayed regardless of what their individual status may be.
Give Status #
Only orders that have not been given a status yet are displayed.
In Progress #
Orders that are in the process of being prepared are displayed.
Completed #
Only orders that have been completed are listed with this filter.
On Hold #
Orders that should not be prepared right away or are otherwise waiting on an additional item are displayed.
Canceled #
All orders that have been canceled are displayed with this filter setting.


