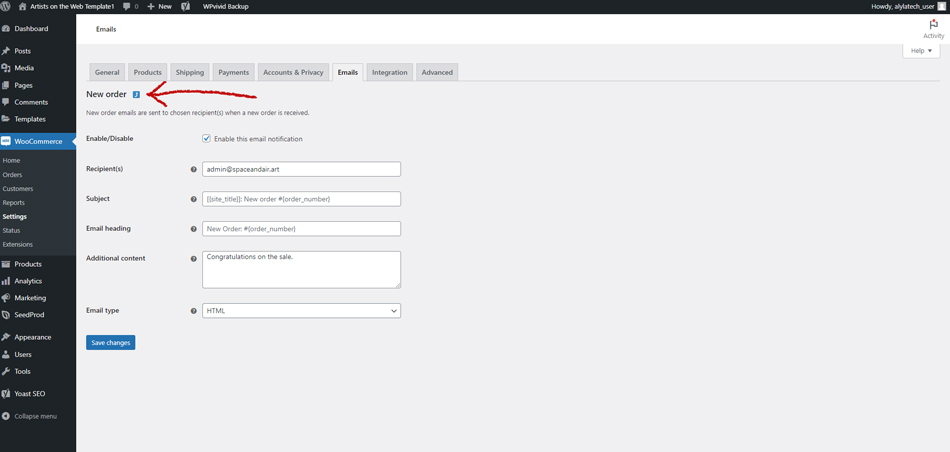
When getting started with your website, it is VERY IMPORTANT to have your WooCommerce admin email address set properly. To set the email address, follow this procedure:
Step 1 #
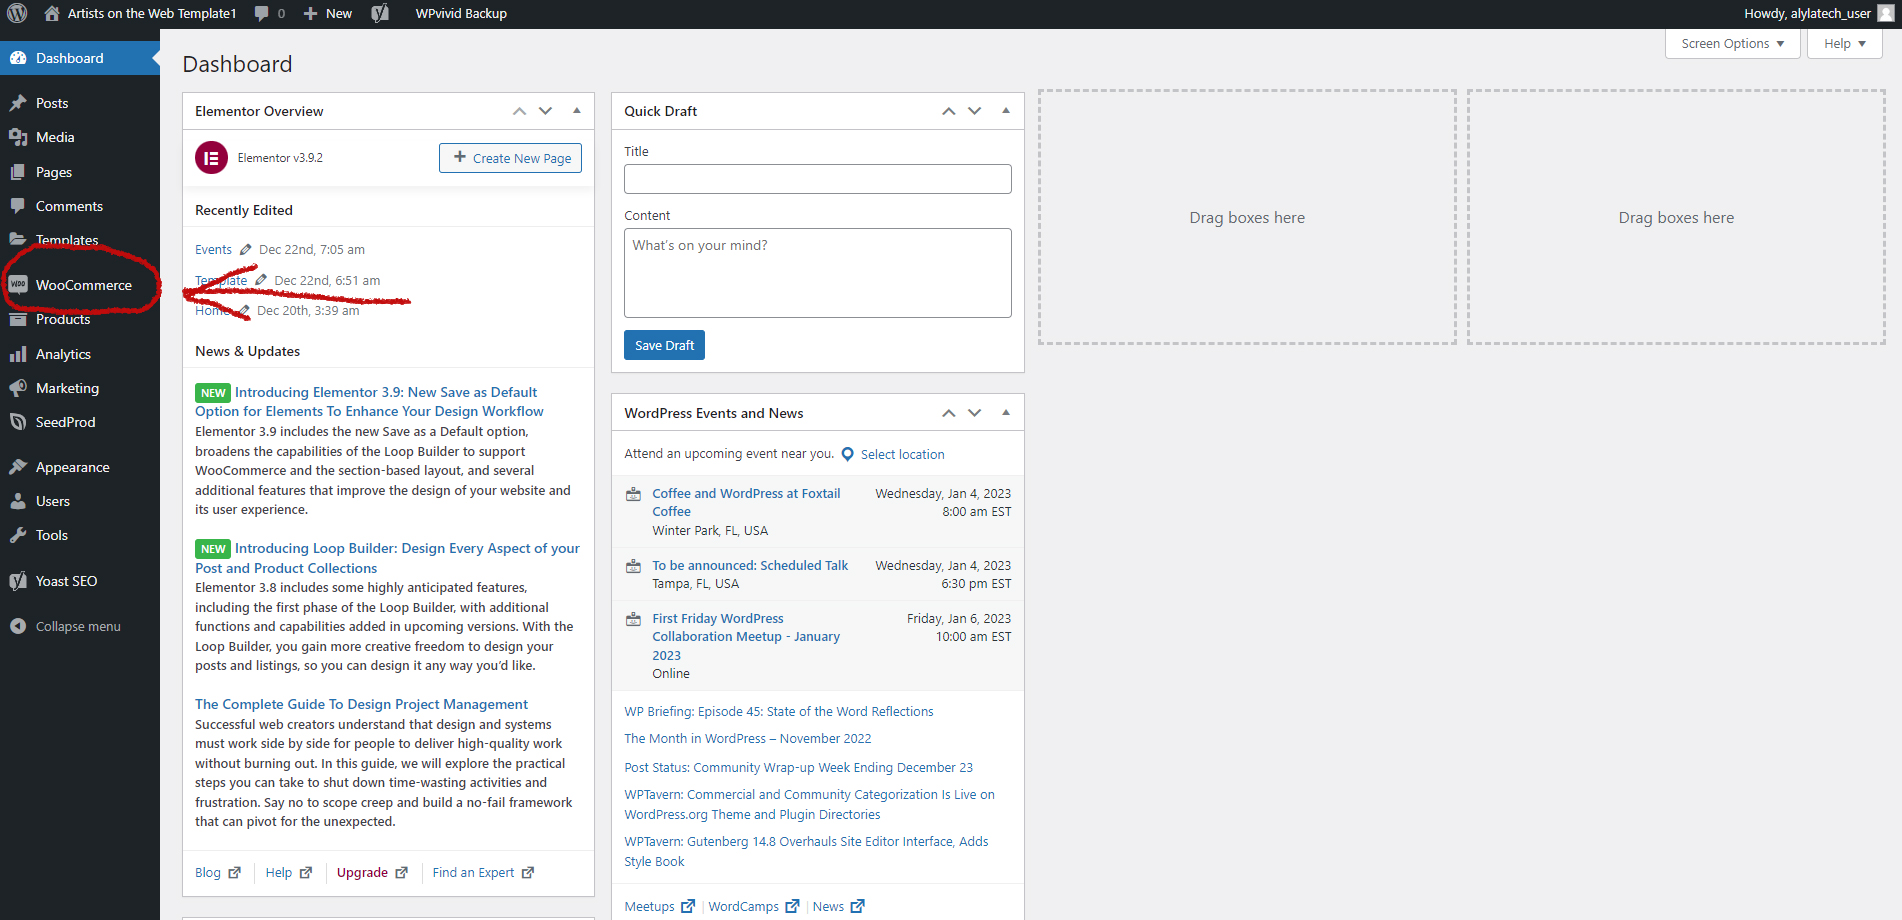
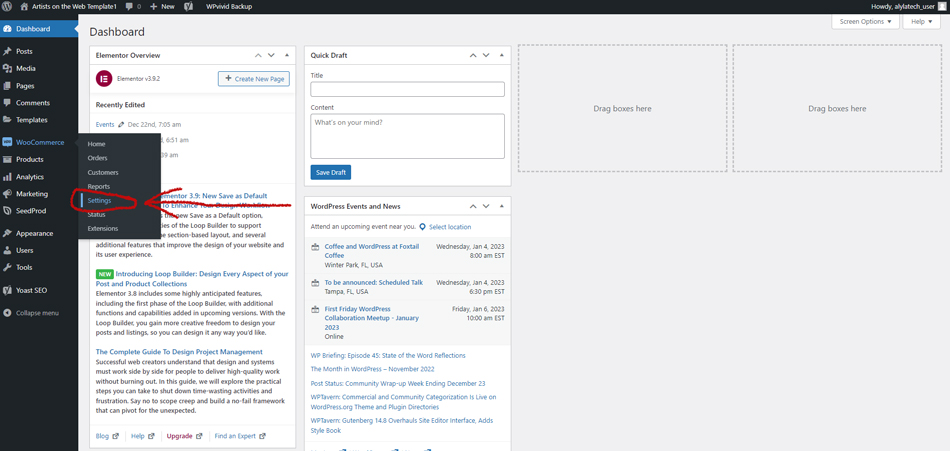
From the dashboard of your admin backend, navigated down the left-hand navigation column and hover your cursor over the “woocommerce” link (see fig.1). A second menu will appear. Click on “settings” (see fig.2).
Step 2 #
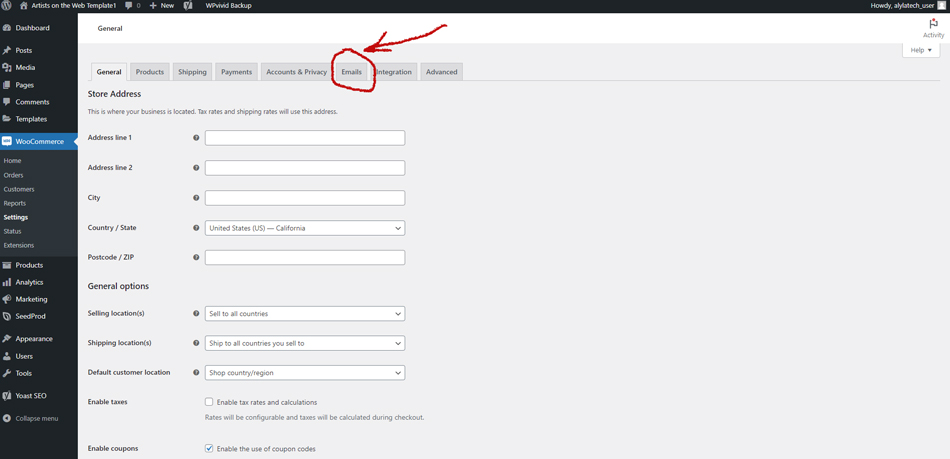
You will now arrive at the “general” tab of the settings page (see fig.3).
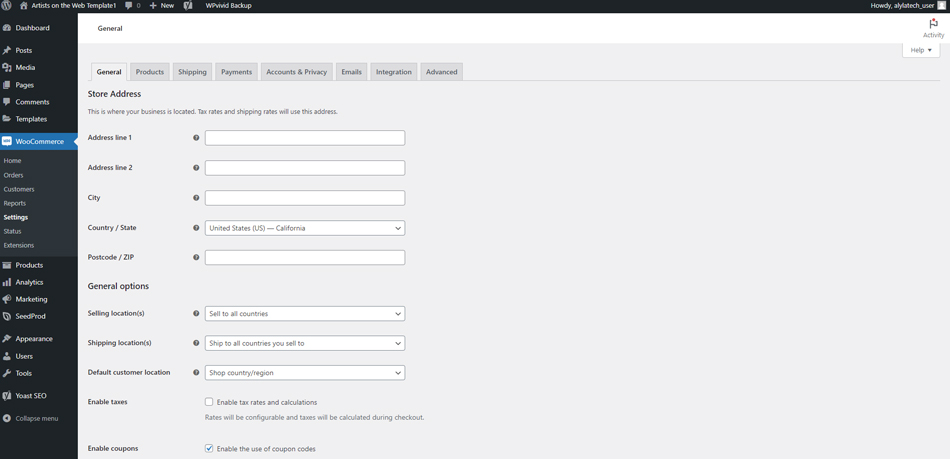
Click on the tab that says “emails” (fig.4).
Step 3 #
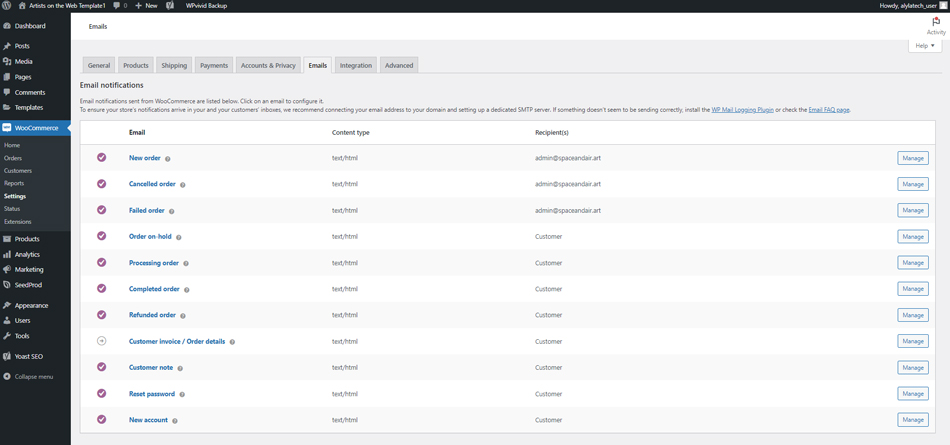
Upon arriving at the “email notifications” page, you will notice a listing of all of the various types of emails that can be sent from WooCommerce (see fig.5).
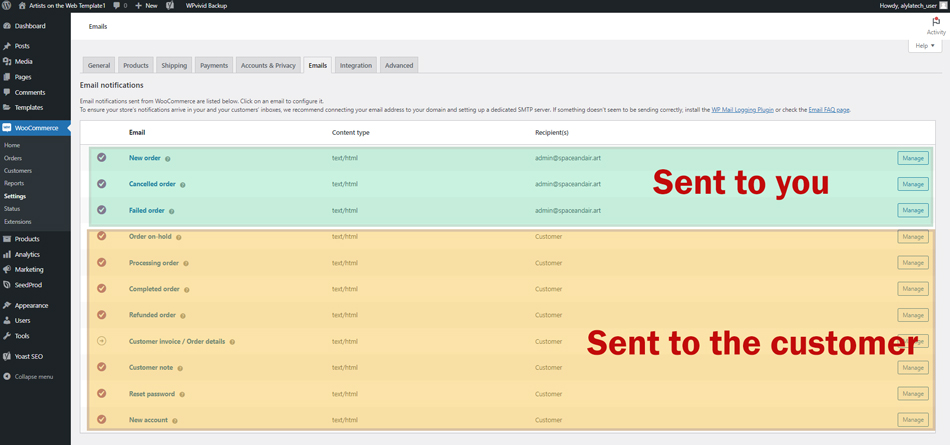
The first three are sent to you as the administrator and the remaining eight are sent to the customer (see fig.6).
Step 4 #
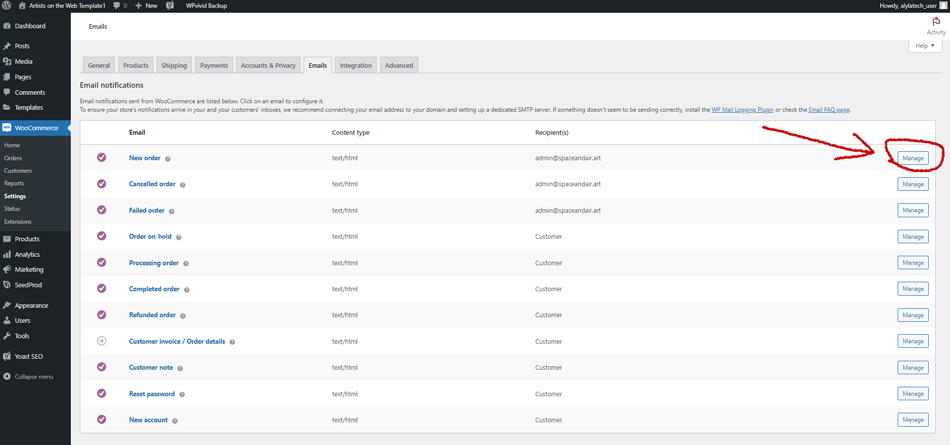
In order to change the recipient address, you will click the “manage” button for each of the three emails you receive as the admin recipient.
In this example, we will click the “manage” button for the “new order” email (see fig.7).
Step 5 #
Now, you will arrive at the “new order” page (see fig.8).
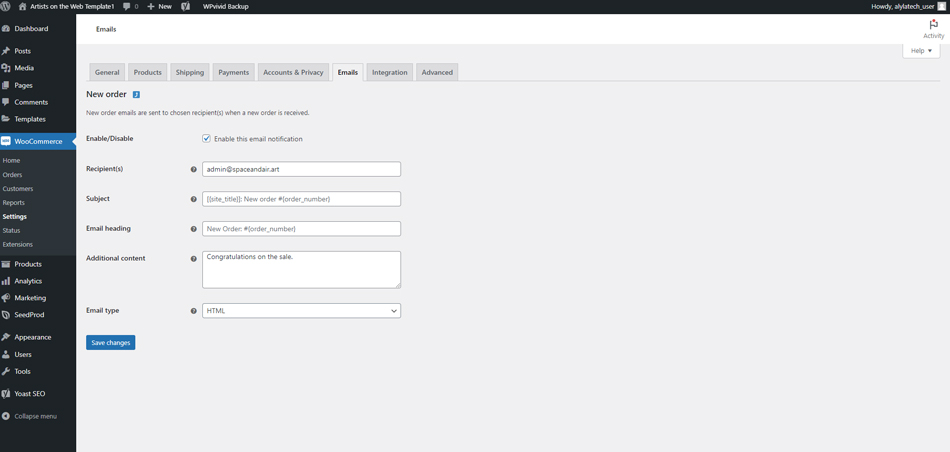
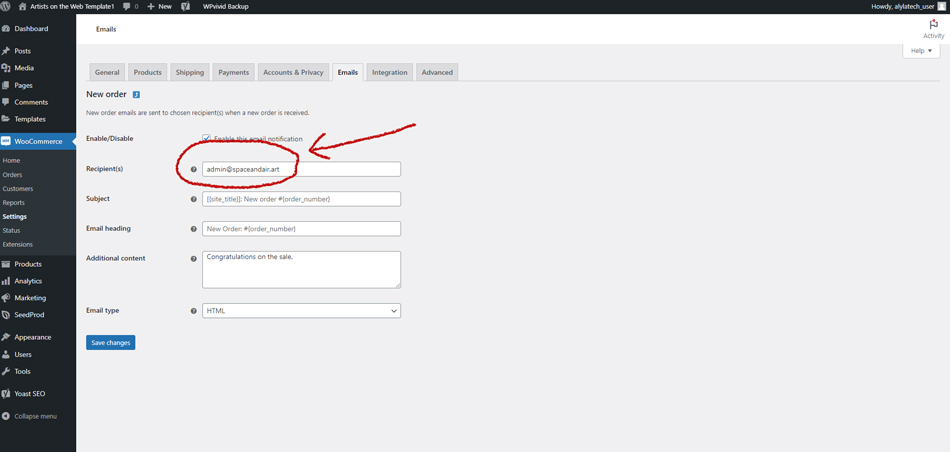
Change the email address that is in the “recipient(s)” field to the email address that you would like to receive notifications to (see fig.9).
Step 6 #
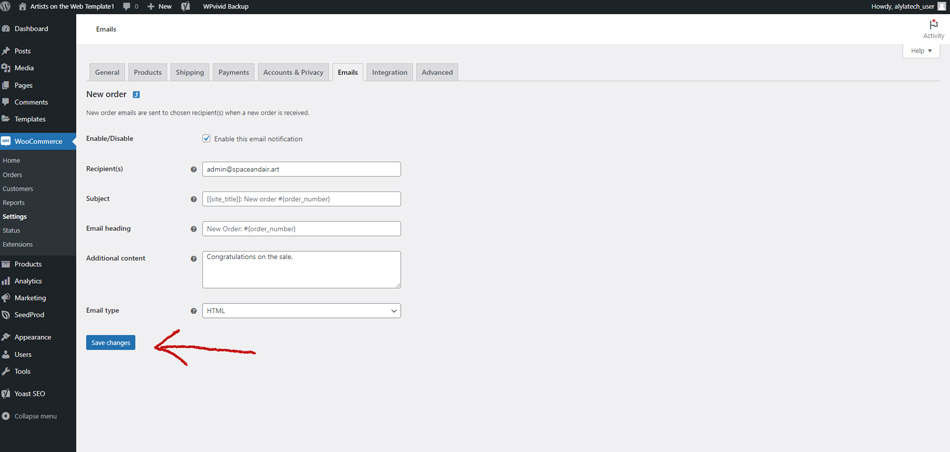
Click on the blue “save changes” button and the recipient email address that you have entered is now saved (see fig.10).
Step 7 #
To changed the recipient email address for the other two admin email notifications, click on the small blue box that is next to the title “new order” (see fig.11) and follow steps 4 through 6.
